Write your JavaScript
In this step, we will:
- Add a click and keyup listener to the follow button
- Set a follow state on element
- Add a the profile photo
- Properly disconnect our element
First, we'll go ahead and listen for triggering events on the button. The best place to add a listener is in the constructor, according to the W3C Custom Elements draft section called "2.2 Requirements for custom element constructors":
In general, the constructor is responsible for setting the initial state, default values, event listeners, and a shadow root.
Since our base PFElement that we extended already sets up a shadow root, all we'll need to do is set up an event listener.
import PFElement from "../../pfelement/dist/pfelement.js";
class PfeCoolElement extends PFElement {
static get tag() {
return "pfe-cool-element";
}
static get meta() {
return {
title: "Cool element",
description: ""
};
}
get templateUrl() {
return "pfe-cool-element.html";
}
get styleUrl() {
return "pfe-cool-element.scss";
}
static get events() {
return {};
}
// Declare the type of this component
static get PfeType() {
return PFElement.PfeTypes.Container;
}
static get properties() {
return {};
}
constructor() {
super(PfeCoolElement, { type: PfeCoolElement.PfeType });
this._clickHandler = this._clickHandler.bind(this);
this.button = this.shadowRoot.querySelector("button");
this.button.addEventListener("click", this._clickHandler);
}
disconnectedCallback() {}
_clickHandler(event) {
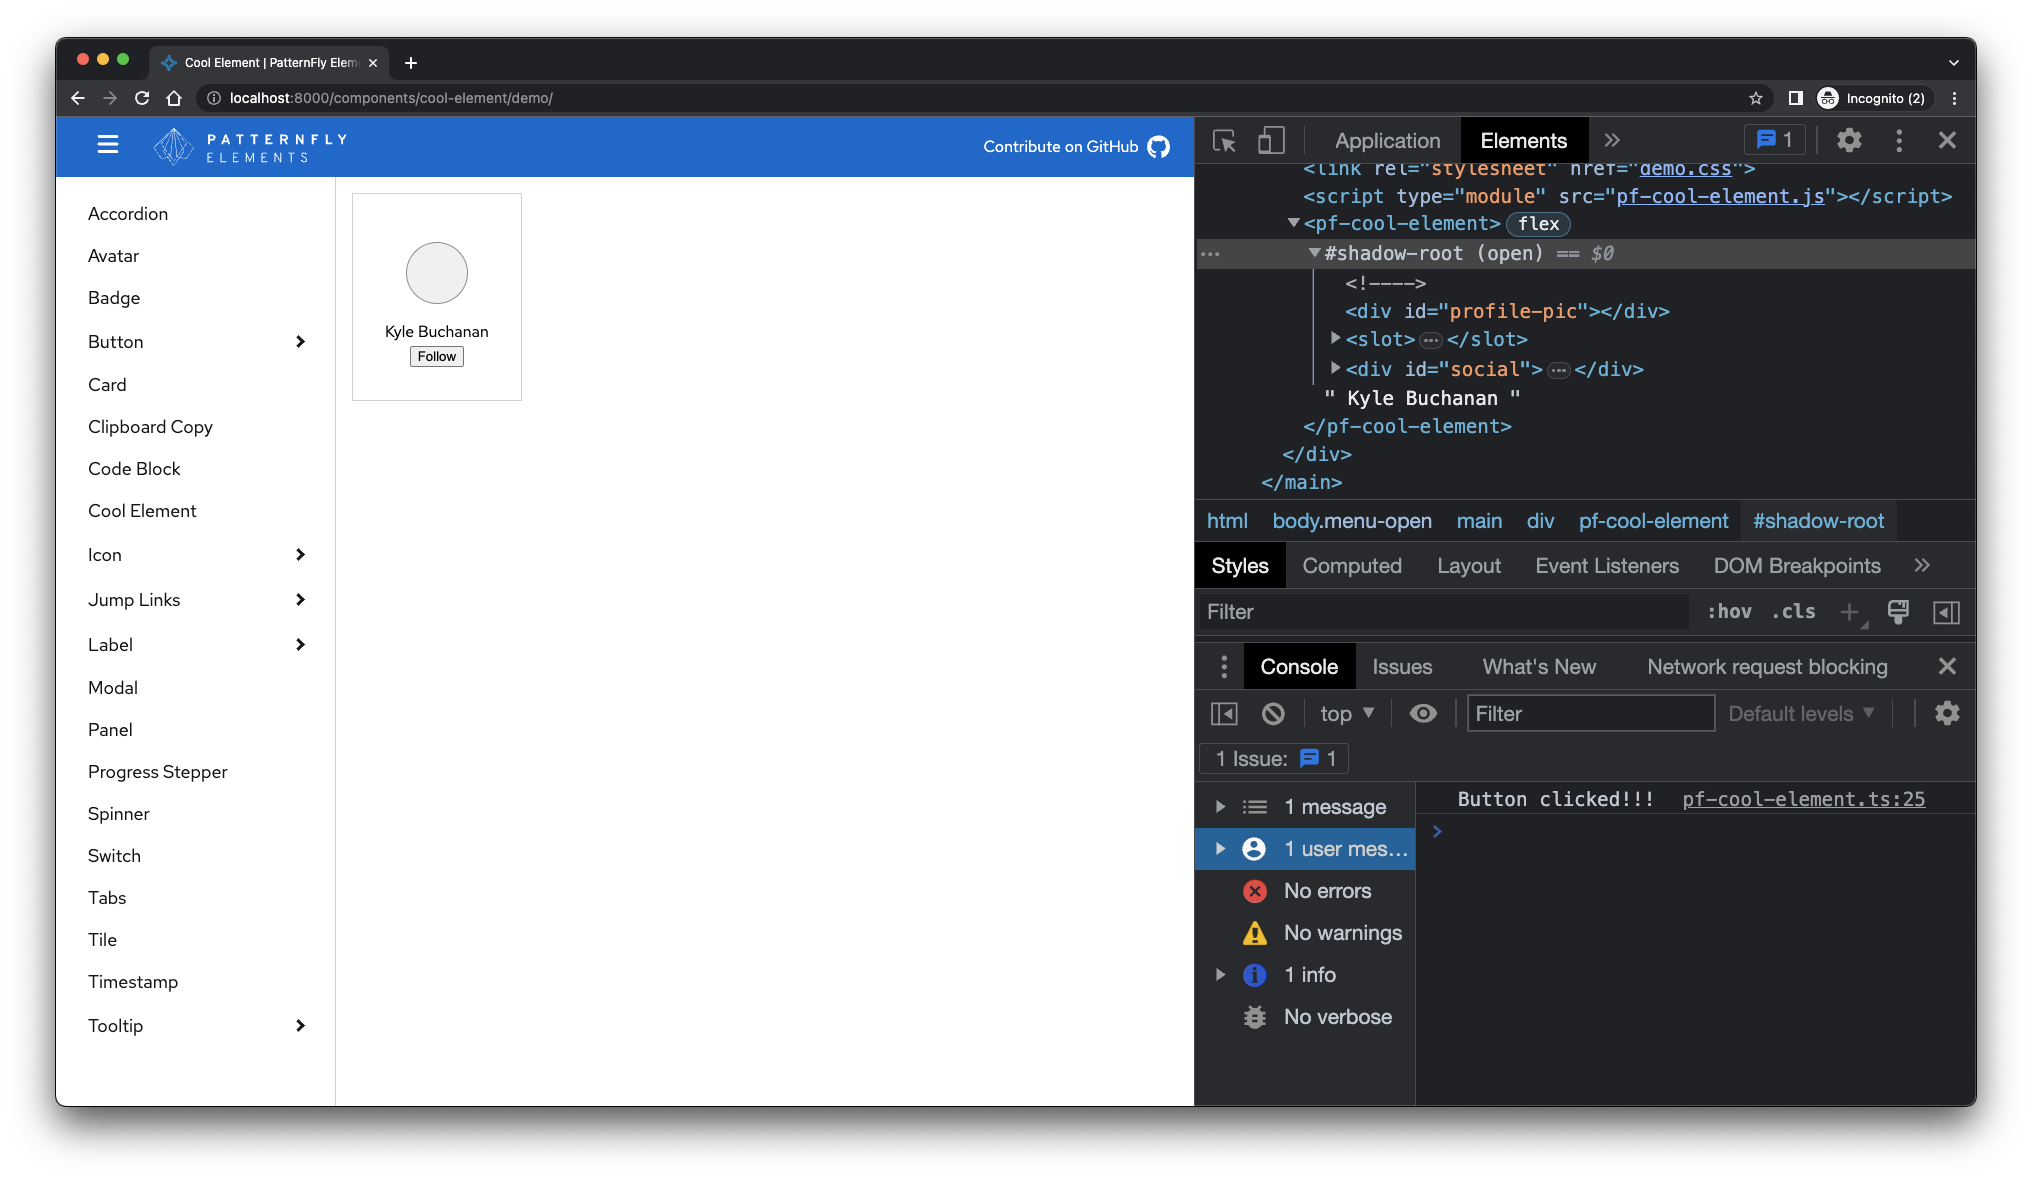
console.log("Button clicked!!!");
}
}
PFElement.create(PfeCoolElement);
export default PfeCoolElement;
In the constructor, we ran querySelector on our shadowRoot to locate the button and added a click listener this._clickHandler to capture the event. For now, the _clickHandler logs that the button was clicked. Notice also that the this context is bound to our click and keypress handlers to continue using this to refer to our element inside these methods.
Please note the underscore before the handlers' method name. This is a convention you'll notice in other custom elements where the author is trying to signal that it's meant as a private method.
After saving your files, the demo page will refresh and you'll notice the start of your button interactivity.
Properties
When a user clicks our "Follow" button, we'd like to update the state of the component to indicate whether the user is "following" or not. To do this, we'll add a property to our component that will maintain the state.
...
static get properties() {
  return {
    follow: {
      type: Boolean,
      default: false
    }
  }
}
...
Now that we have the follow property added, we can toggle it in our _clickHandler.
...
_clickHandler() {
this.follow = !this.follow;
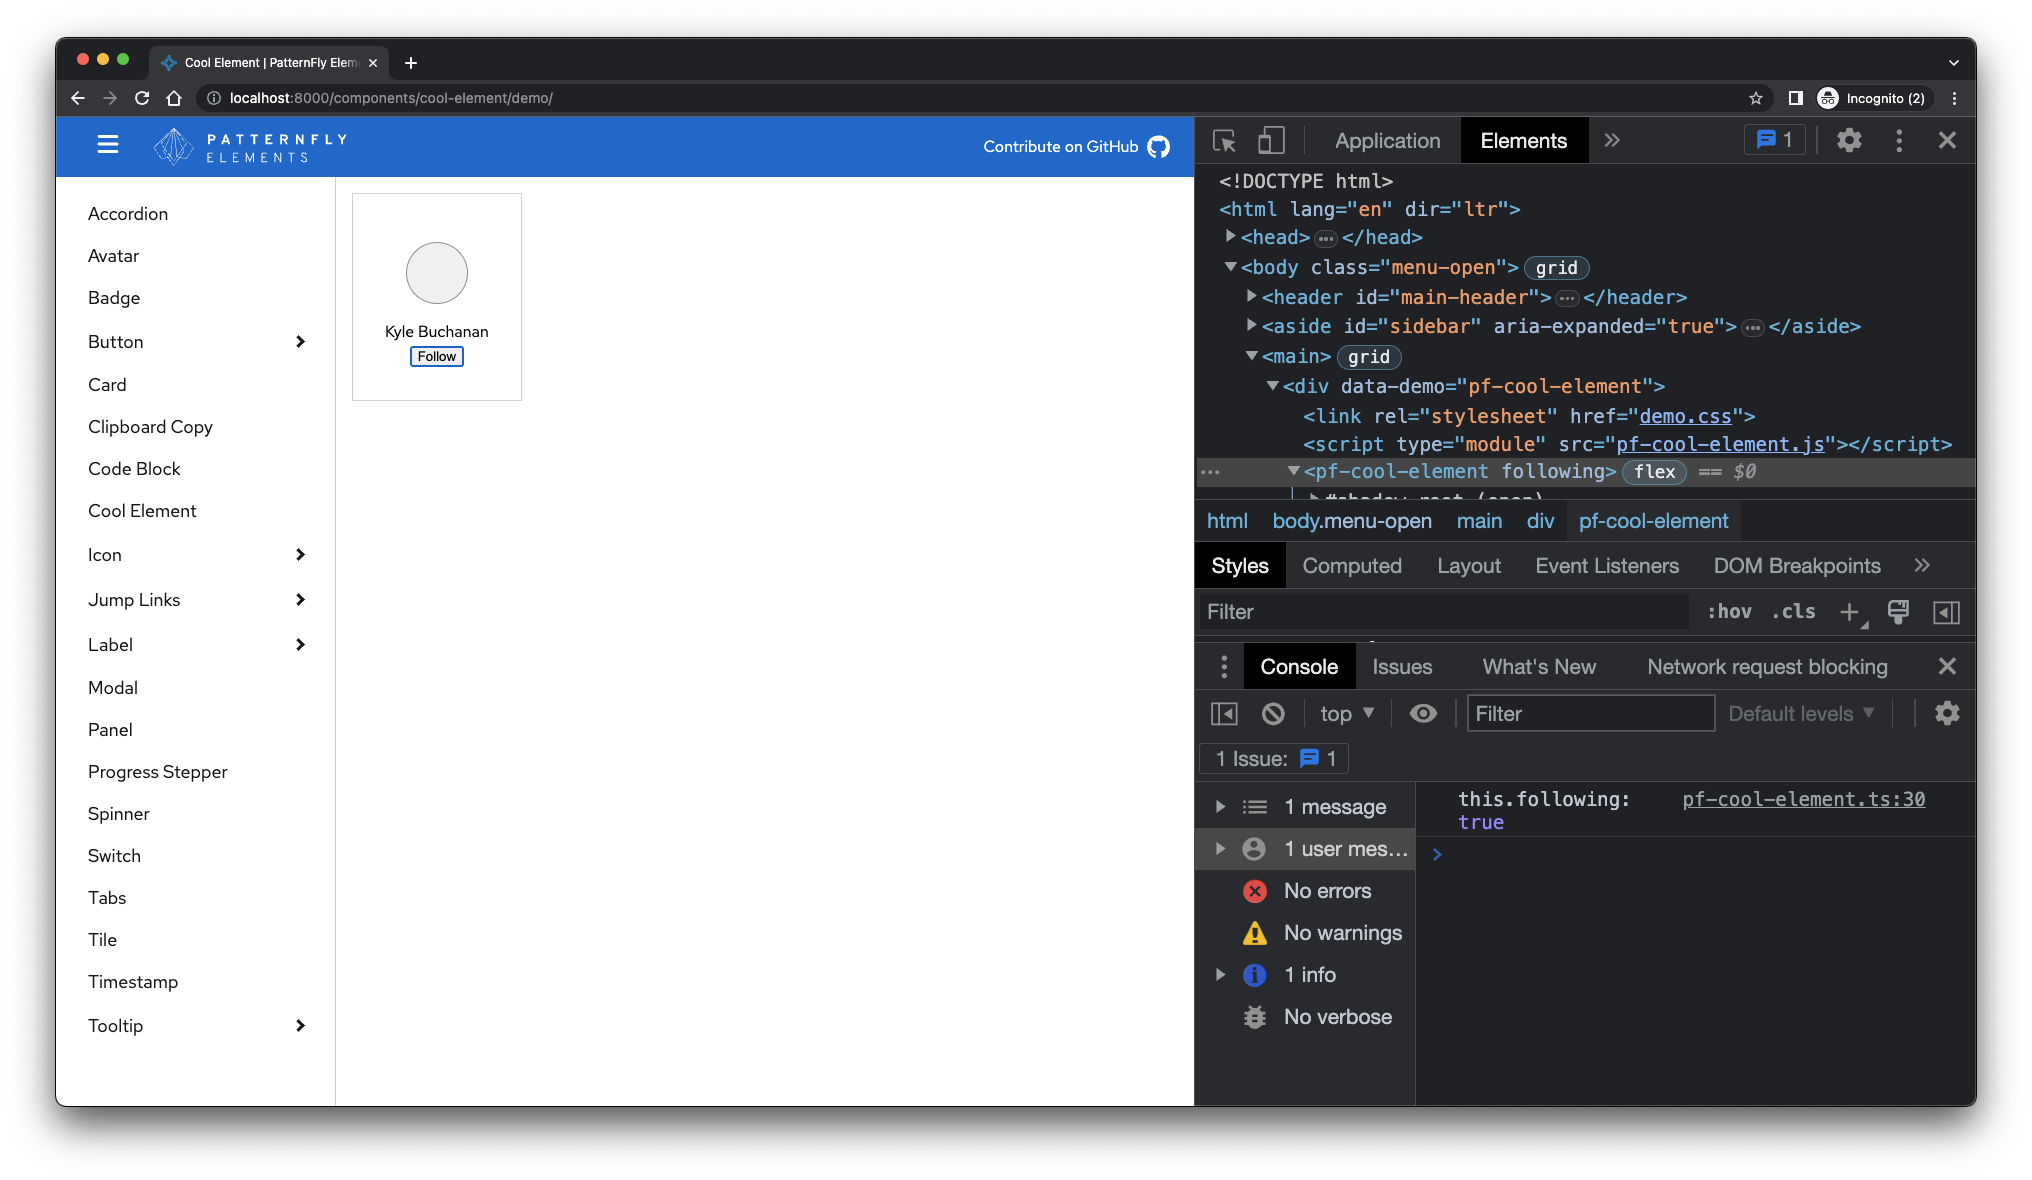
console.log("this.follow:", this.follow);
}
...
One thing to notice is that state of the follow property is available in the markup as an attribute on the wrapper element thanks to some behind-the-scenes work of the PFElement base class.
Observed properties
Let's add one more thing with the follow property. We should update the button's text to "Unfollow" when this.following is true and to "Follow" when this.following is false. Observing a property is an easy way to tell a custom element to perform an action when a property changes. In this case, we keep an eye on the follow property for changes, and when it does, we'll update the button's text.
To observe a property, add an observer property to the follow property and set the value to the name of the function you want to run when the property value changes.
...
static get properties() {
  return {
    follow: {
      type: Boolean,
      default: false,
      observer: "_followChanged"
    }
  }
}
...
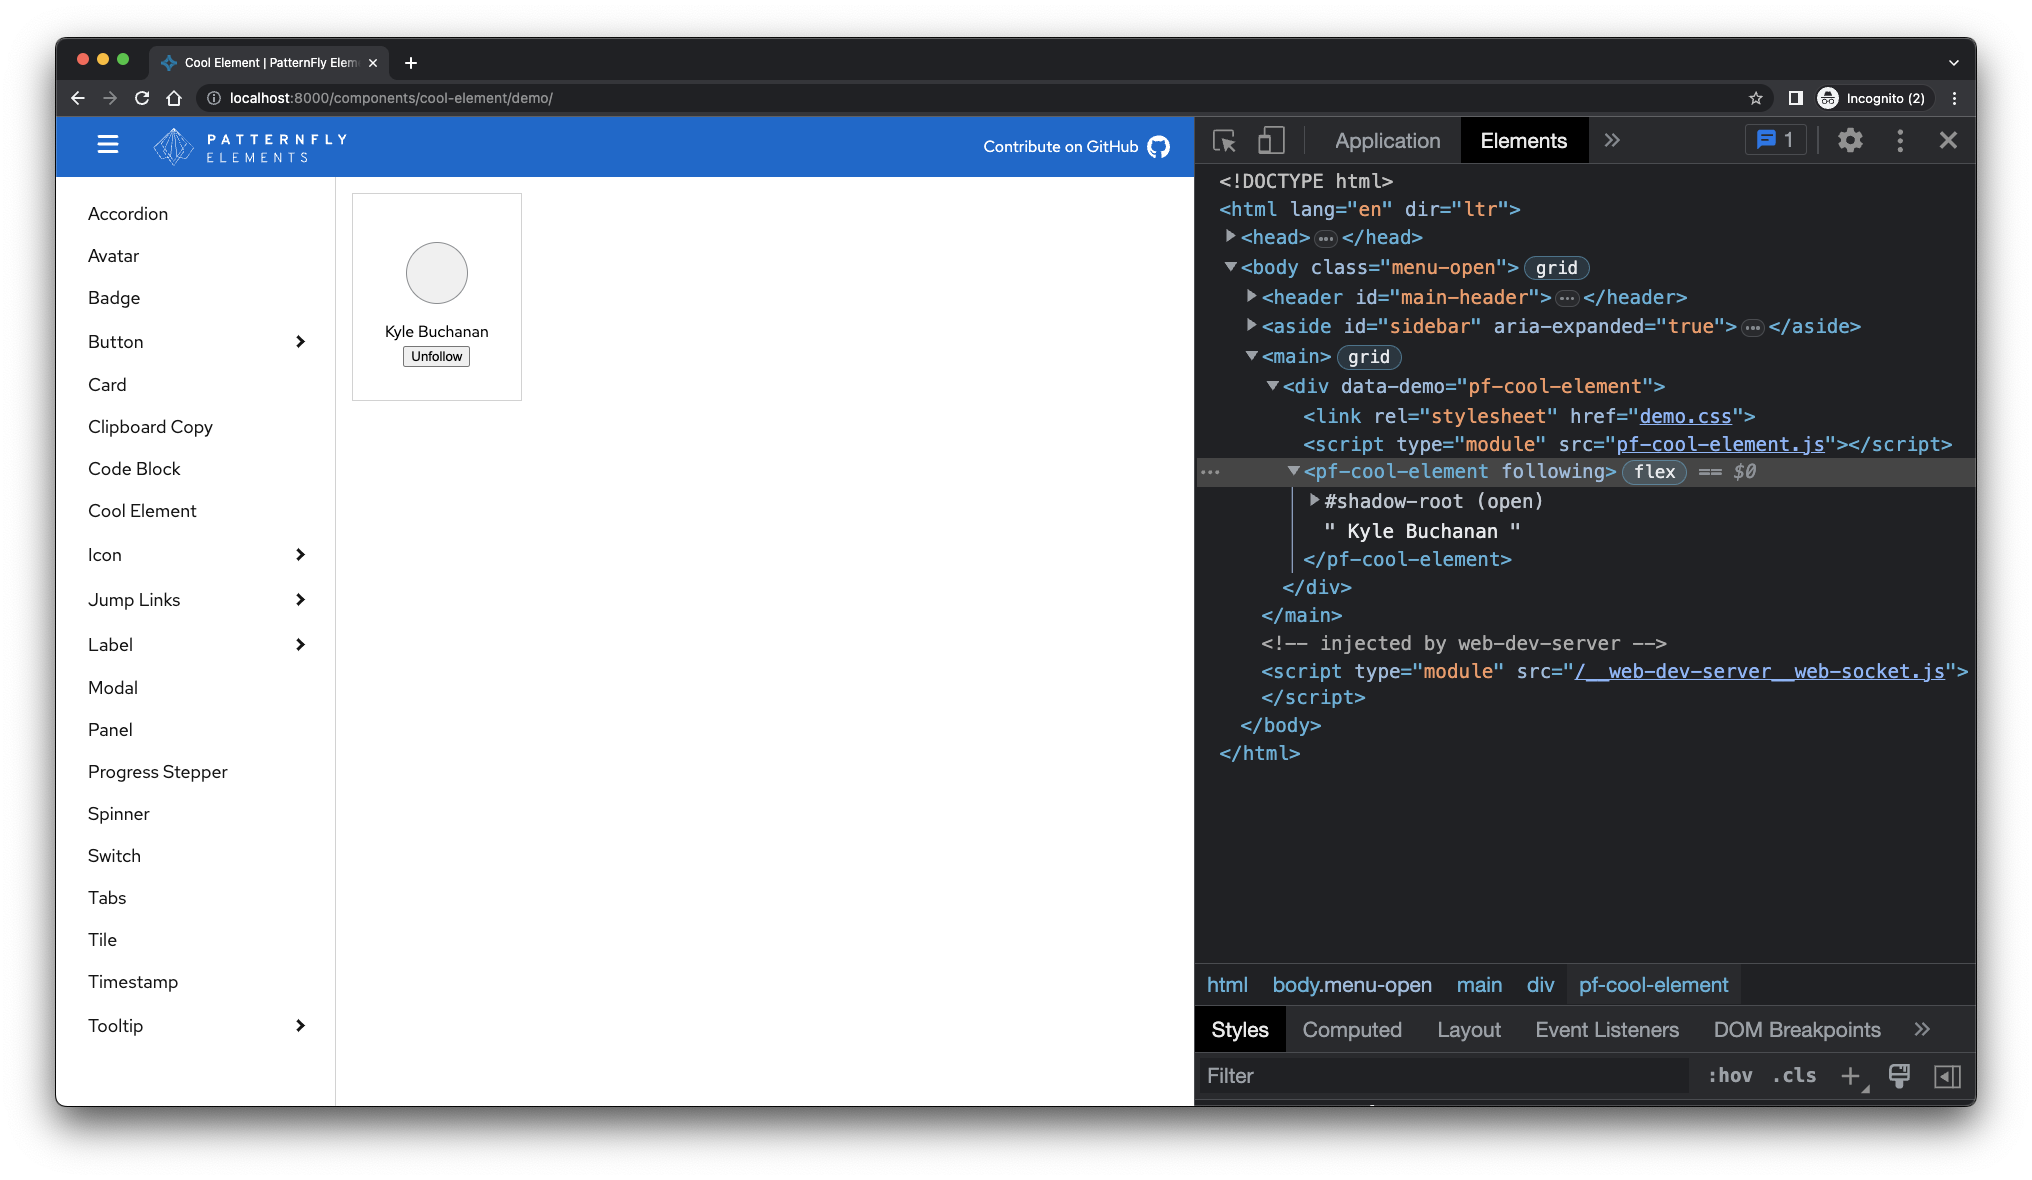
Now, when this.follow changes, we can react to the change and update our button text to "Unfollow" or "Follow" based on the value of our follow property.
...
_followChanged() {
  this.button.textContent = this.follow ? "Unfollow" : "Follow";
}
...
Under the hood, PatternFly Elements uses the
observedAttributesfeature of web components to make this work. Any properties that have anobserverproperty set on them,PFElementwill add those properties to theobservedAttributesarray of the component.
Next, we'll add a photoUrl property to pass in a profile image. Once again, we'll use the observer property to handle the work. We can add a profile image with only a few updates!
Initially, we'll need to include a reference to #profile-pic in the constructor by setting this.profilePic.
constructor() {
  super(PfeCoolElement, { type: PfeCoolElement.PfeType });

  this._clickHandler = this._clickHandler.bind(this);
  this.button = this.shadowRoot.querySelector("button");
  this.button.addEventListener("click", this._clickHandler);

  this.profilePic = this.shadowRoot.querySelector("#profile-pic");
}
Now, we'll add the photoUrl property to our static get properties() and an observer to run a function when the value changes:
...
static get properties() {
  return {
    follow: {
      type: Boolean,
      default: false,
      observer: "_followChanged"
    },
    photoUrl: {
      type: String,
      observer: "_photoUrlChanged"
    }
  };
}
...
_photoUrlChanged() {
  this.profilePic.style.backgroundImage = `url(${this.photoUrl})`;
}
...
Finally, we'll need to update our demo page (/demo/index.html) to include the photo-url attribute. Pass in an image URL to see that it's working.
<pfe-cool-element photo-url="https://avatars2.githubusercontent.com/u/330256?s=400&u=de56919e816dc9f821469c2f86174f29141a896e&v=4">
  Kyle Buchanan
</pfe-cool-element>
We can also modify /src/pfe-cool-element.scss to adjust the background-size property on .pfe-cool-element__profile.
The final result should look like this:
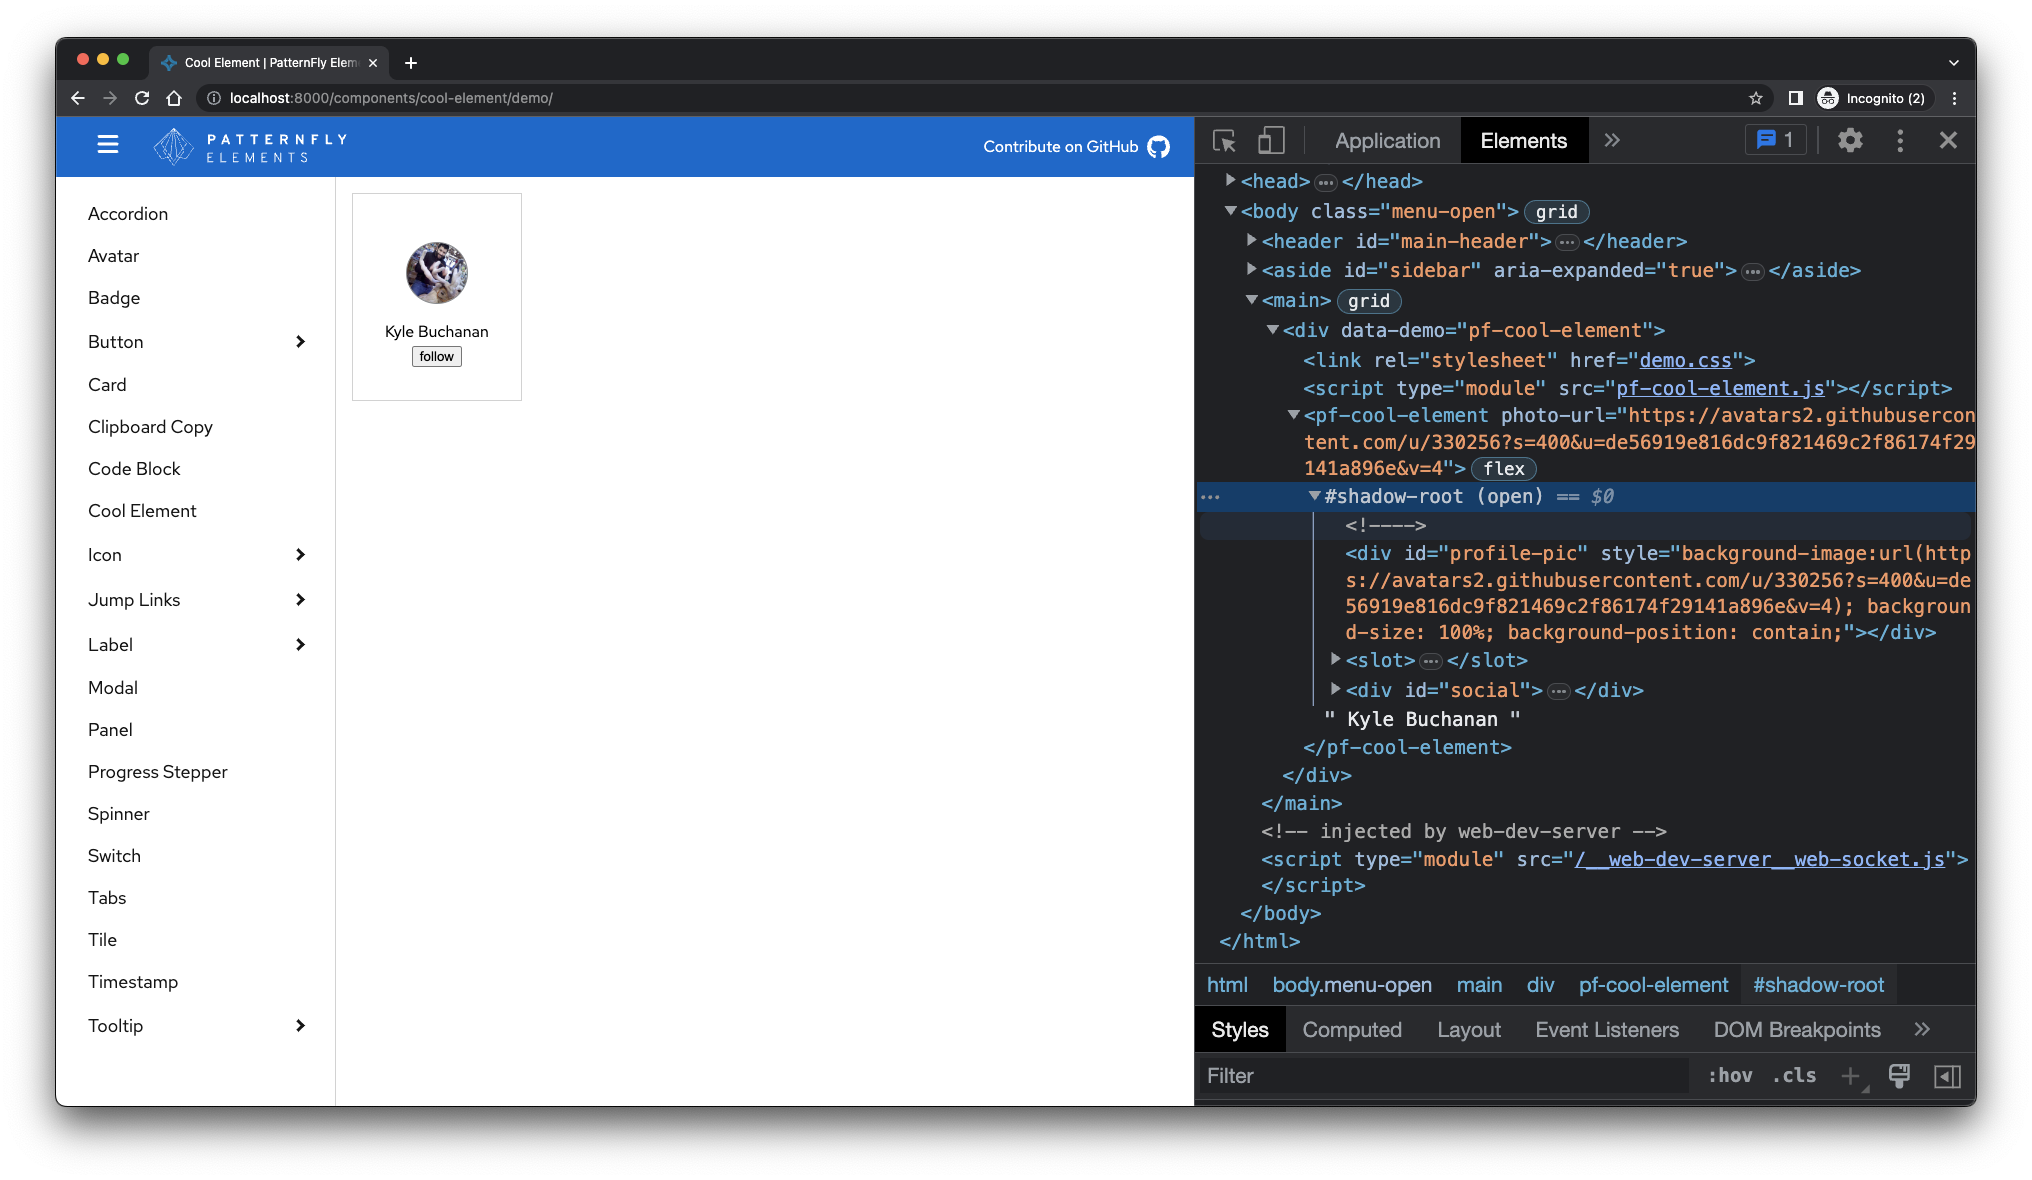
Great! You're almost there.
Disconnected Callback
It's a good idea to clean up your event listeners after a web component is disconnected. The lifecycle callback that runs on web components is the disconnectedCallback, ideal for cleaning up our code. For this example, all we'll need to do is remove the listeners we added to the follow button.
disconnectedCallback() {
  this.button.removeEventListener("click", this._clickHandler);
}
Wrap-up
That's all it takes, folks! To summarize, we built a web component that extends our base element, and added some HTML, custom styles, and interactivity to our component. What's cool is that we've only scratched the surface of what's possible with custom elements.
For your reference, here's the final Javascript code for pfe-cool-element:
import PFElement from "../../pfelement/dist/pfelement.js";

class PfeCoolElement extends PFElement {
  static get tag() {
    return "pfe-cool-element";
  }

  static get meta() {
    return {
      title: "Cool element",
      description: ""
    };
  }

  get templateUrl() {
    return "pfe-cool-element.html";
  }

  get styleUrl() {
    return "pfe-cool-element.scss";
  }

  static get events() {
    return {
      select: `${this.tag}:follow`
    };
  }

  // Declare the type of this component
  static get PfeType() {
    return PFElement.PfeTypes.Container;
  }

  static get properties() {
    return {
      follow: {
        type: Boolean,
        default: false,
        observer: "_followChanged"
      },
      photoUrl: {
        type: String,
        observer: "_photoUrlChanged"
      }
    };
  }

  constructor() {
    super(PfeCoolElement, { type: PfeCoolElement.PfeType });

    this._clickHandler = this._clickHandler.bind(this);
    this.button = this.shadowRoot.querySelector("button");
    this.button.addEventListener("click", this._clickHandler);

    this.profilePic = this.shadowRoot.querySelector("#profile-pic");
  }

  disconnectedCallback() {
    this.button.removeEventListener("click", this._clickHandler);
  }

  _clickHandler(event) {
    this.follow = !this.follow;
  }

  _followChanged() {
    this.button.textContent = this.follow ? "Unfollow" : "Follow";
  }

  _photoUrlChanged() {
    this.profilePic.style.backgroundImage = `url(${this.photoUrl})`;
  }
}

PFElement.create(PfeCoolElement);

export default PfeCoolElement;
Now that our code works, we should outline its properties and requirements in the schema.