Write your HTML
Now that our element is set up and our dev server is running, let's take advantage of the slot and shadow root to make our element a bit more interesting.
We'll edit the /src/pfe-cool-element.html file to add some additional HTML. Let's turn pfe-cool-element into a profile element that has a profile photo, a username, and a button to follow the user.
Here's the updated HTML in /src/pfe-cool-element.html:
<div class="pfe-cool-element__profile" id="profile-pic"></div>
<slot></slot>
<div class="pfe-cool-element__social">
  <button class="pfe-cool-element__social--follow">Follow</button>
</div>
We'll also need to update /demo/index.html so that the user's name is passed into the slot in /src/pfe-cool-element.html:
<!DOCTYPE html>
<html>
<head>
<meta charset="utf-8">
<meta name="viewport" content="width=device-width, minimum-scale=1.0, initial-scale=1.0, user-scalable=yes">
<title>PatternFly Element | pfe-cool-element Demo</title>
<noscript>
<link href="../../pfelement/dist/pfelement-noscript.min.css" rel="stylesheet">
</noscript>
<link href="../../pfelement/dist/pfelement.min.css" rel="stylesheet">
<!-- Stylesheets for testing light DOM styles.
<link rel="stylesheet" href="https://cdnjs.cloudflare.com/ajax/libs/twitter-bootstrap/4.3.1/css/bootstrap-reboot.css">
<link rel="stylesheet" href="https://cdnjs.cloudflare.com/ajax/libs/typebase.css/0.5.0/typebase.css">
-->
<link rel="stylesheet" href="../../pfe-styles/dist/pfe-base.css" />
<link rel="stylesheet" href="../../pfe-styles/dist/pfe-context.css" />
<link rel="stylesheet" href="../../pfe-styles/dist/pfe-layouts.css" />
<!-- uncomment the es5-adapter if you're using the umd version -->
<script src="/examples/node_modules/@webcomponents/webcomponentsjs/custom-elements-es5-adapter.js"></script>
<!-- Use webcomponents-loader when you are adding support for more modern browsers -->
<!-- <script src="/examples/node_modules/@webcomponents/webcomponentsjs/webcomponents-loader.js"></script> -->
<!-- IE11 test: use bundle + require with umd files -->
<!-- Use webcomponents-bundle when supporting much older browsers like IE11 -->
<script src="/examples/node_modules/@webcomponents/webcomponentsjs/webcomponents-bundle.js"></script>
<!-- Tests require pulling in the UMD version of the files -->
<script src="https://cdnjs.cloudflare.com/ajax/libs/require.js/2.3.5/require.min.js"></script>
<script>require([
"../dist/pfe-cool-element.umd.js",
"../../pfe-band/dist/pfe-band.umd.js"
])</script>
</head>
<body unresolved>
<pfe-band color="lightest">
<h1><code>pfe-cool-element</code></h1>
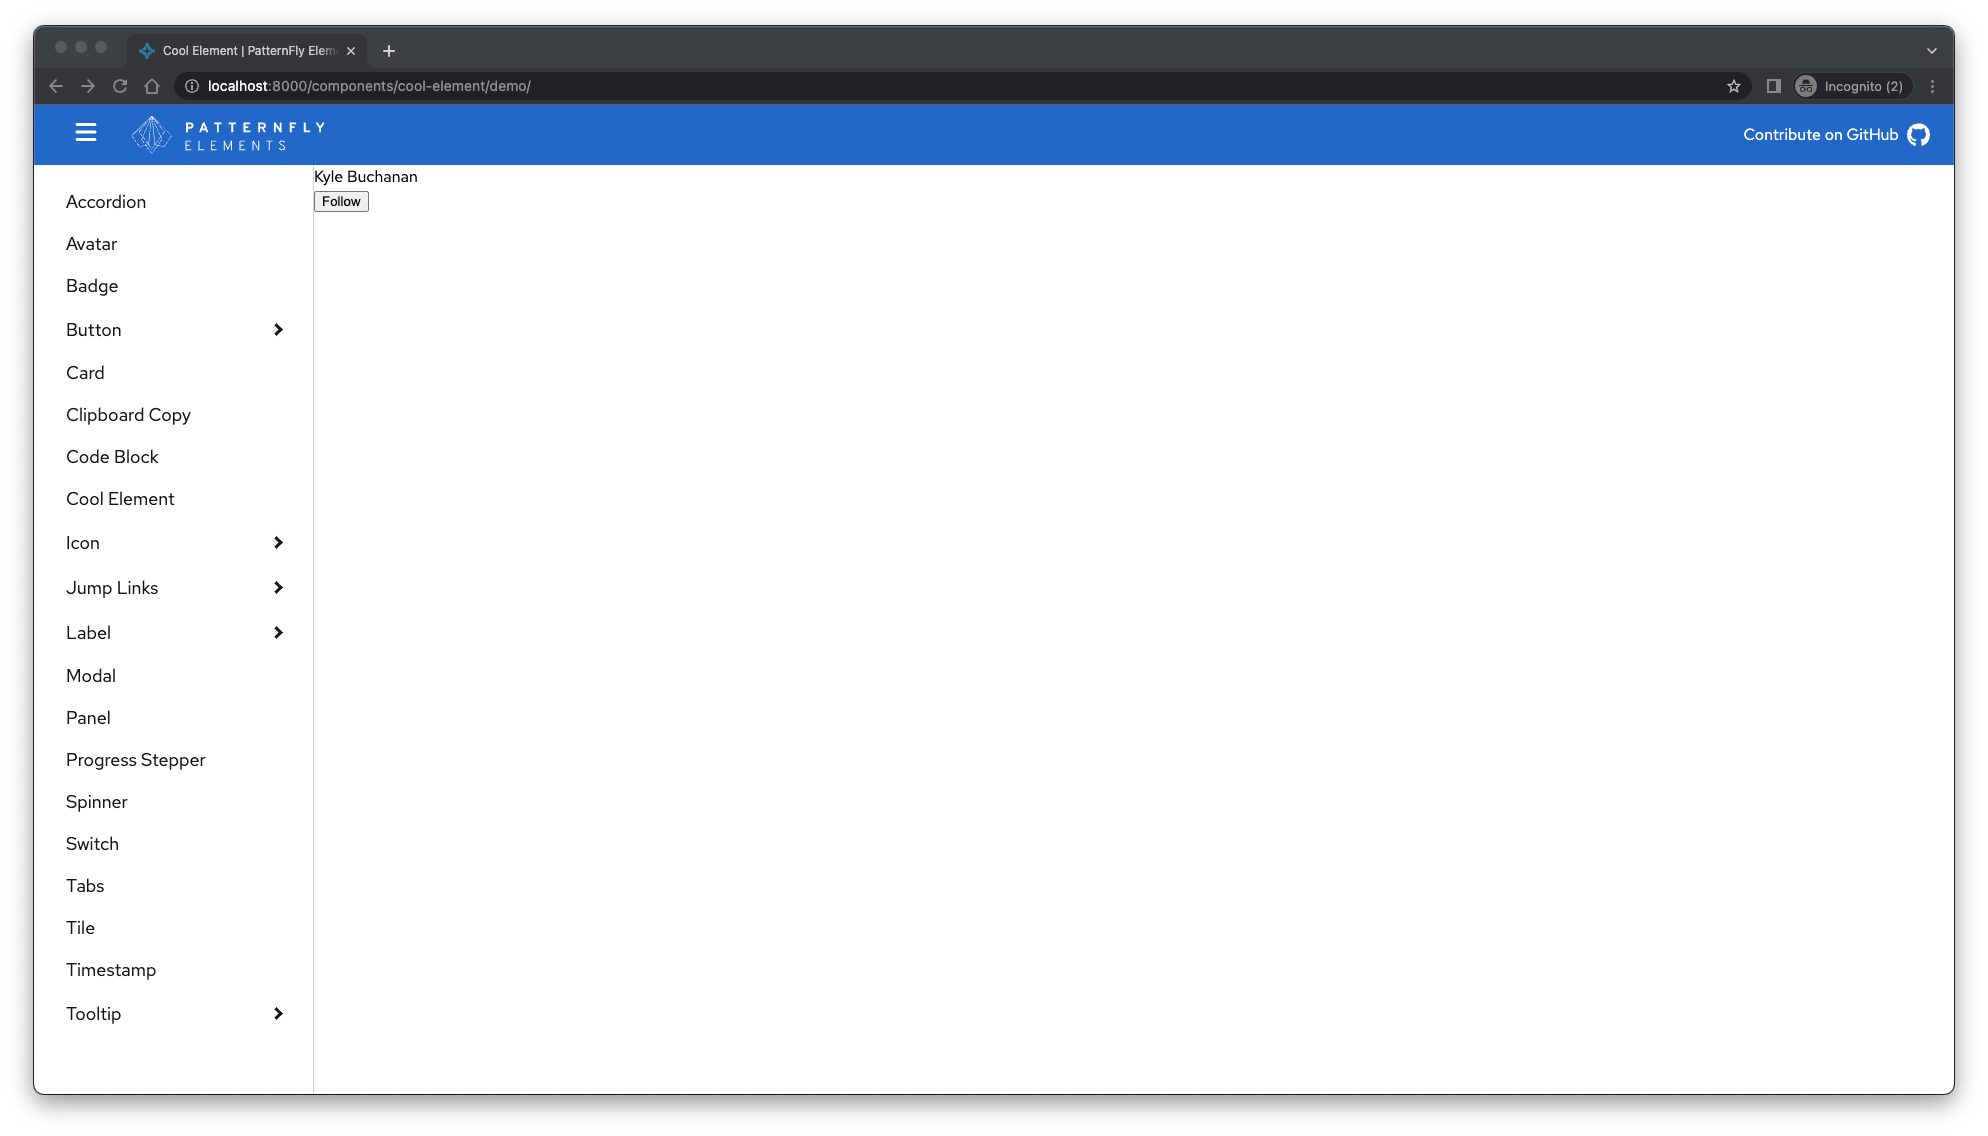
<pfe-cool-element>
Kyle Buchanan
</pfe-cool-element>
</pfe-band>
</body>
</html>
Slots take the HTML from the light DOM and moves it right into the shadow DOM. To learn more about shadow DOM and how to use slots, check out Shadow DOM v1: Self-Contained Web Components.
Here's how it should look in the browser:
Remember that any changes we make in the /src directory are being watched while the npm run live-demo command runs. When you save changes, the merge and compile tasks run from the gulpfile to update the ES6 and ES5 versions of the component in the root of your element.
The gulp task takes the HTML from /src/pfe-cool-element.html and merges it into the ES6 version of your component while the HTML for the element is included in the get html() method of our element. The same thing happens for the ES5 version, but we've minified this file.
Now that we've added the HTML, let's style our element by updating the Sass file.